Solar water heaters have now spread all over the town, and its practicality and contribution are beyond words. For people in remote areas, more is to choose to install after buying, sometimes inevitably there are loopholes, affecting the performance of water heaters or causing serious accidents. Let's take a look at the installation of solar water heaters .
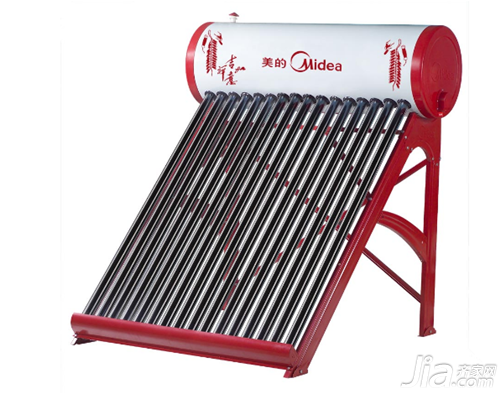
The advantages and disadvantages of domestic solar water heaters
Advantages of solar water heater:
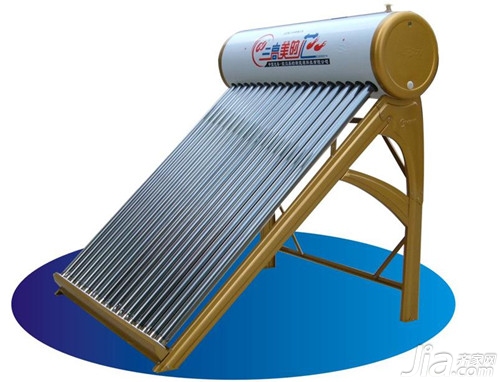
1. Energy saving. Part of the household living expenses is water and electricity, but the use of solar water heaters can save electricity and gas costs by more than 90%, which is very economical. From a social point of view, it reduces the development of other non-renewable energy sources and has a positive effect.
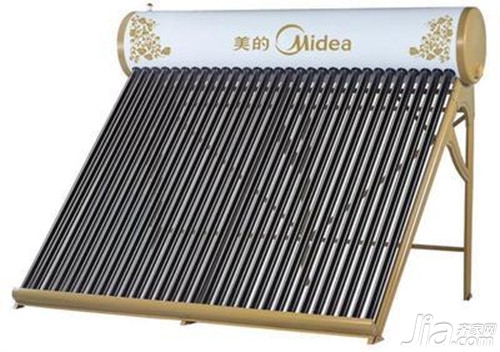
2. Environmental protection. According to calculations, each domestic solar water heater will reduce carbon dioxide, carbon monoxide, dust, sulfur dioxide, nitrogen and hydrogen compounds due to coal-fired emissions to the atmosphere during the basic 15 years of use. It is a pollution source recorded in hundreds of tons, so environmental pollution can be mitigated to a certain extent.
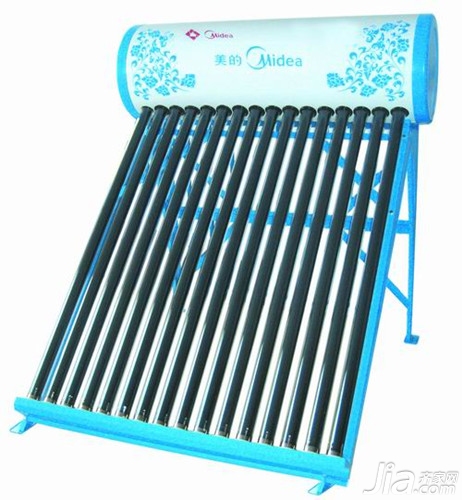
3. Security. There is no hidden danger of poisoning and electric shock when using solar energy, which is safe and reliable. If you use gas water heaters or electric water heaters, there may be a risk of poisoning or electric shock, and the number of users increases, and the number of injuries or deaths is also increasing.
Solar water heater installation preparation work:
1. Prepare construction tools. For example: screwdriver, wrench, electric drill, etc.
2. Unpack the water heater and check whether the accessories are complete according to the packing list. 1) The number of vacuum tubes is complete and intact; 2) Whether the electric heating is intact; 3) Whether the water tank box has dents; 4) Whether the supporting accessories are complete; 5) It can only control whether the instrument packaging is intact, etc.
Mounting brackets
1. Selection of installation location. Generally choose on the roof, the direction is to sit north to south, positive to the south and 5 to 10 degrees west to ensure that there is no obstruction. The number of pipelines entering the house should also be reduced, so that the sunshine time can be increased.
2. Assemble the bracket. When installing, you should follow the instructions to assemble the front piece and the back piece, and then use a wrench to tighten the screws without loosening. The side of the front and rear panels are diagonally supported to play a structural role in strengthening.
3. After installing the water tank and vacuum tube, check all the screws and tighten them again.
Fixed bracket
Generally, cement piers, expansion bolts or wire rope fixing brackets are used. Of course, you need to choose the best fixing method according to your own roof. Wire rope fixing method: put the wire rope or large steel bar on the left and right frames of the front bracket and the left and right u-rings of the barrel holder, and tighten with nuts to stretch the four connected steel wires or steel bars to the four corners of the water heater, on the parapet wall or other Choose an appropriate location, drill the hole and press the expansion hook, and firmly connect the steel wire rope or steel bar with the corresponding expansion hook U-ring.
Install the water tank
1. Installation of electric heating. First open the dustproof insulation cover of the electric heating port, loosen the screw inside, then pry off the bottom plug, check the built-in sealing rubber ring to see if it is tight, then put the built-in electric heating rod in, and restore it after it is tightly attached. Tighten the bolt.
2. Put the water tank on the assembled home bucket support first, connect the water tank and the bucket support with bolts, tighten the connection nut between the shelf and the bucket support, so that the distance between the two ends of the water tank and the left and right ends of the bracket is equal, the center line of the vacuum tube and the front The plane of the bracket is parallel, and then put the silicone seal ring into the inner barrel flanging hole and lay it flat.
Install vacuum tube
1. Installation of tube base. Install the vacuum tube base first, install the lower part of the heat collecting tube, and install the base in the designated position of the bracket.
2. Intubation. First check the sealing silicone ring sleeved in the tank of the insulation layer, then check whether the tail angle of the vacuum tube process is damaged, then check the transparency of the coating like mercury, and check whether the nozzle has processing burrs and roundness. Evade the outer sealing rubber ring of the vacuum tube into the vacuum tube for about 15cm, fully soak the mouth of the tube with soapy water, and grasp the tail end of the vacuum tube with your right hand. One is to protect the process corner and the other is to facilitate the insertion of the tube. Insert the vacuum tube in the direction of the vertical nozzle, and gently push it into the water tank evenly, and then insert it and return to the tube seat, so that all the vacuum tubes are installed in order.
wiring
1. Electric heating wiring. The red wire is the live wire, the two-color wire is the ground wire, and the remaining one is the neutral wire. Stripped, exposed about 2cm of copper wire, and covered with heat shrinkable tube for insulation and dustproof. Then connect the power cord and these three wires in a color-matching manner, and firmly connect them, and wrap them with waterproof insulating tape from the outside to avoid short circuit.
2. Electric heating cable connection. Cut a bevel at the port of the heating cable to make the distance between its two wires relatively long to avoid short-circuiting the link. Wrap it with insulating tape to fully insulate it, align the end of the heating cable with the end of the tube, and fix it on the official road with insulating tape to keep it close to the wall of the tube. The other end is the terminal of the intelligent controller. If there is a booster pump, the pump wiring is connected in parallel with the electric heat tracing.
Install intelligent controller
1. Positioning. Drill holes in the indoor side wall, and then insert the plastic expansion tube to install the fixed base of the measurement and control instrument on the wall;
2. The sensor signal line and the signal line of the control box are docked according to the mark and plugged in firmly;
3. The constant temperature mixed water solenoid valve should be installed horizontally, and the wiring of the solenoid valve should be connected to the terminal on the control box.
Commissioning
After installation, turn on the controller and run. If there is no problem, clean up the tools and clean. Finally, calculate and record the indoor installation parts and quantity, and verify with the owner, if it is correct, please sign the user for approval.
Relevant information about the installation of solar water heaters is introduced here for everyone, I hope this article is helpful to everyone. If you still do n’t understand something, you can leave a comment below, we will answer it as soon as possible.
What, the decoration still uses his own money? ! The Qi family is decorated in installments, with an ultra-low annual interest rate of 3.55% and a maximum loan of 1 million. Apply now to enjoy the discount
If you are interested in brand cooperation, content cooperation, and advertising of this website, please send an email to :.
Water heater solar water heater


Germany imported beads
Imported French lens
mould Die-casting Eight edge type Revolving arm
Optional emergency power supply≥3 hours
The main features:
1)Ideal cold light effects
Using the new LED cold light source, ensure energy saving and environmental protection and long service life up to 80,000hours and more.
The temperature increase of surgeon`s head below 1℃. LED do not engender infrared ray and ultraviolet radiation, without the temperature
rise and tissue damage caused by halogen shadowless light, also it can accelerate the wound healing after surgery, and without Radiation pollution.
With color temperature constant and soft, LED is very close to the sunshine.
1) Excellent shadowless effect
Lamp with the most scientific radian and Multi point light source design, ensure better uniform illuminance. When the lamps are partially occluded,
also can achieve perfect shadowless effect.Lamp panel radius of gyration ≥182cm, the lamp can be pulled to vertical floor, convenient to any angle illumination.
2) Excellent deep lighting
It is based on modularize method by Computer Aided Design, focused to irradiating with more beams of LED. It produces the deep lighting which beams
more than 1200cm,the illumination of center up to 180,000Lux or more, and offer the color temperature that can be adjusted from 3700K to 5000K which
is close to sunshine. Absolutely, it really reflects the color of human tissue and satisfied by all kinds of operating light needs.
3) Advanced control system
The use of liquid crystal display button control, to meet the needs of the medical staff of different patients with the brightness of the operation.
It offers illuminance memory function.
It does not effect using when a single circuit or one bulb is broken.
4) Universal suspension system
Rotating arm, a new type of alloy material is made of eight edge type.
Balanced system using imported arm module, more than 5 group universal joints, every cantilever must has more than 3 joints which can be rotated in 360°,
The structure is light, easy to manipulate, accurate positioning, can provide the maximum range of regulation.The equipped with fatigue correcting unit and
fix position hand handle device, easy to fix position after long time use.
5) Modern laminar lamp
The thickest part of lamp-chimney is not more than 10cm.
The lamp-chimney is made of ABS, The handle on the central of lamp can be detachable, can take high temperature (≤ 134°C) sterilization treatment,
easily adjust, flexible fixed.
Mobile Type Operating Light,LED Examination Light,Mobile Operation LED Light,Mobile Stand Operating Light
Shandong Kang'erjian Medical Technology Ltd. , https://www.operatingtable.nl